 |
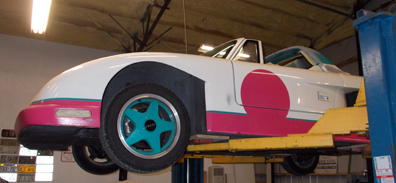
Finally home and on the lift to see what it needs.
|
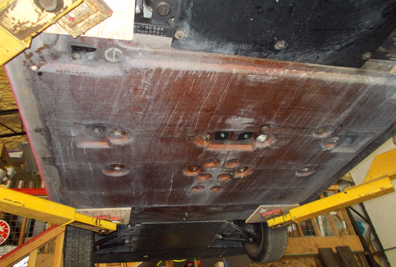 |
This is the bottom of the car...flat!
It has lightwieght removeable panels.
|
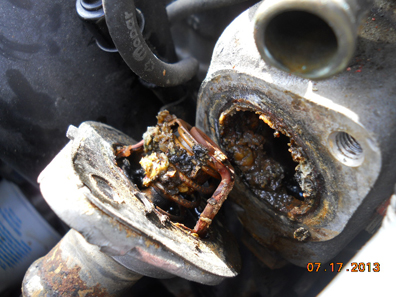 |
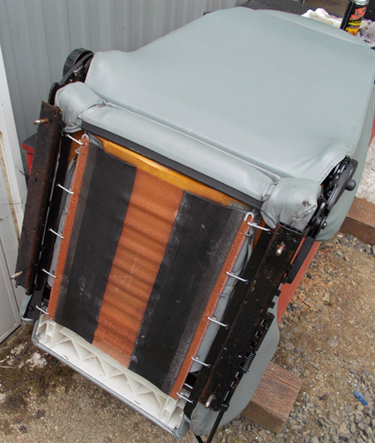
This is the cooling system after sitting 18 years. |
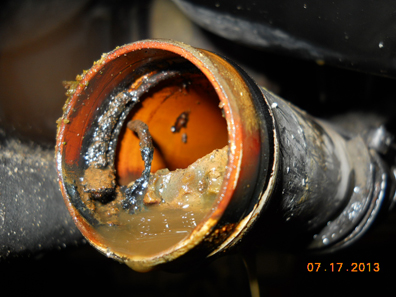 |
The anti-freeze /coolant looked like jello after
sitting those 18 years. |
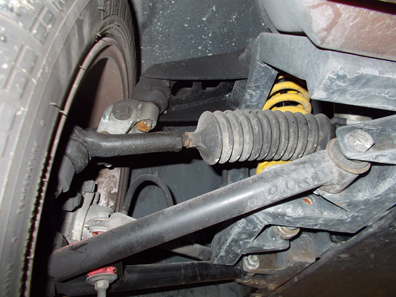 |
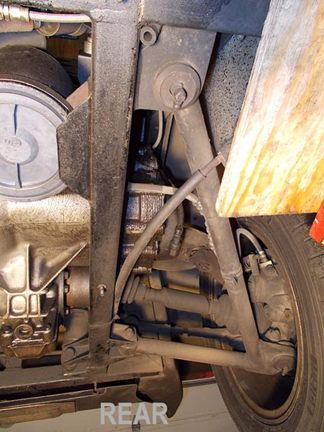
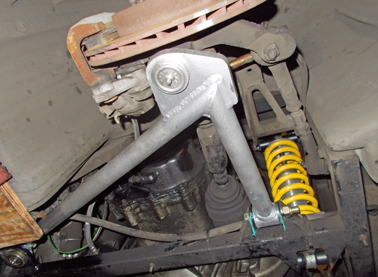
This is the front suspension. |
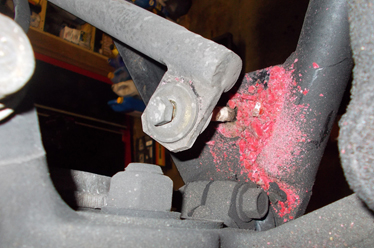 |
This is the front swaybar grommets...a little shot!
Replaced the endlinks. |
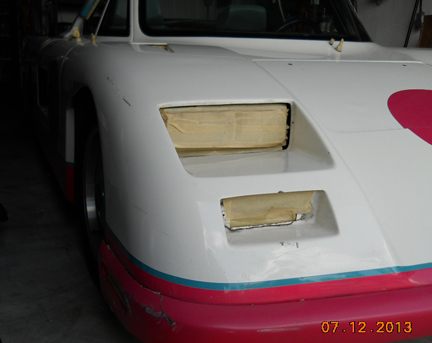 |
This shows a little of the masking tape that was
all over the car. |
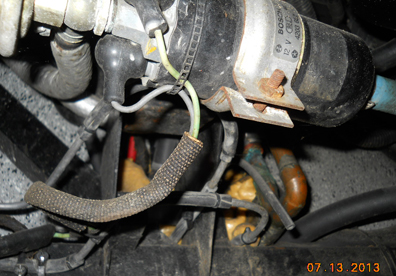 |
The fuel pump and filter needed changed.
The fuel was like varnish. Even after being flushed, the fuel pump plugged up a week after getting it running and needed to be replaced. But this time I added an inline filter before the pump. |
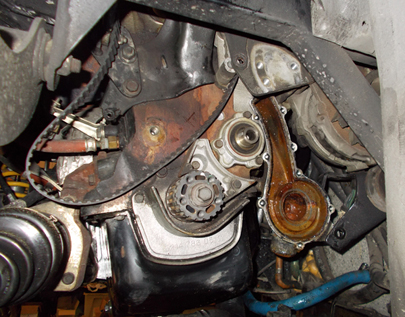 |
Took the front of the engine a part.
Changed the water pump and the
timing belt that was over 18 years old.
Also changed the engine mounts, got them from:
http://www.polybushings.com
|
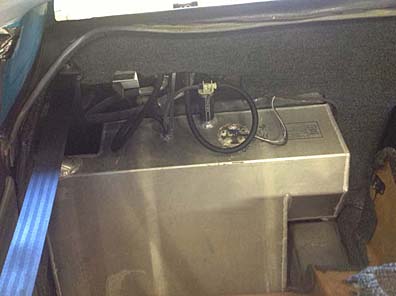 |
The gas tank is all aluminum and is behind the passenger side seat. The fuel pump and filters
are under the car. |
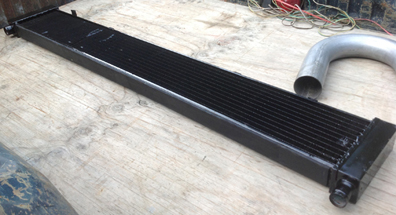 |
This is the radiator. Had it cleaned and a broken
fitting replaced. The location of the radiator is
in the tail of the car. It is almost 5 ft wide.
The exhaust pipe next to it (3") is going to be
for the new exhaust. |
 |
Under the steering wheel cover is a very nice
looking steering wheel. I was told the EPA
mandated the cover. I will put the cover on the shelf. |
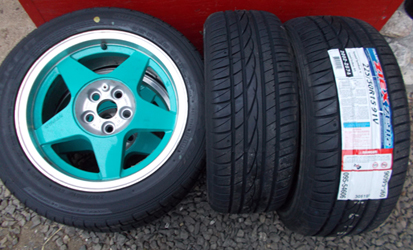 |
The tires looked new but were at least 18 years old. So bought new ones. They are 15 inch.
205x50 for the front
225x50 for the rear |
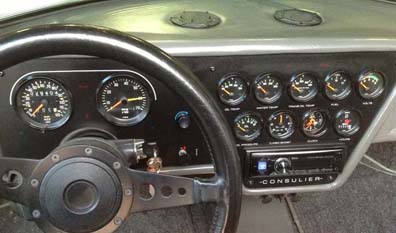 |
Cleaned up the black dash around the gauges.
Had a radio/CD player installed. Then the old
speakers blew apart within a week, had to
replace them also. |
 |
The seat tracks were very sticky. Removed
them and lubed them up. They slide nicely now.
While they were out, I vacuumed the wool carpet.
|
 |
The original front brakes are off of a 1990 Dodge Daytona. I upgraded the knuckles and then added brakes from a 1990 Caravan. |
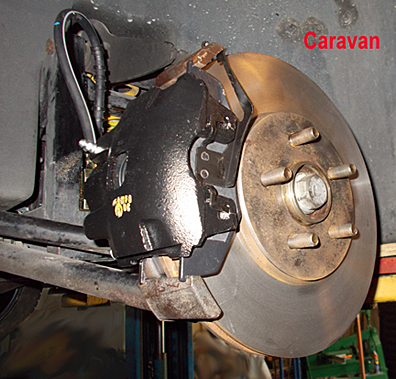 |
This is the Caravan brakes. Original were
10 rotors, these are 11". |
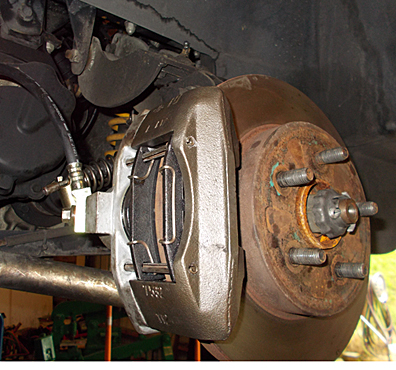 |
The rear brakes are from a 1988 Fireo GT.
I left them, just installed rebuilt calipers and
new pads. Of course had the rotors turned. |
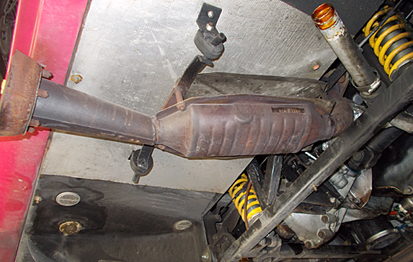 |
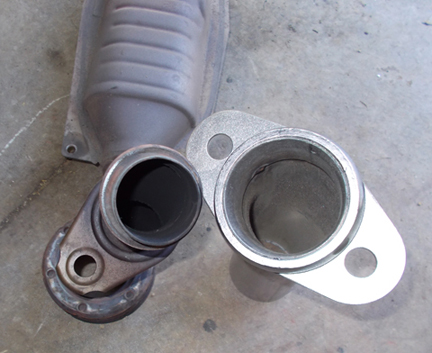
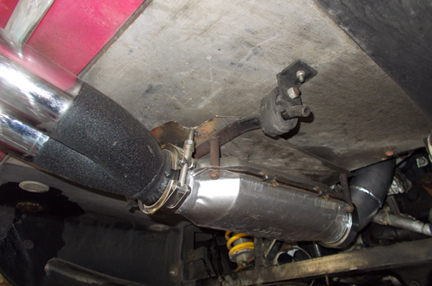
The complete exhaust system. Down pipe
from turbo, elbow, cat, pipe and then the
supertrap. That will all change soon.
(see below) |
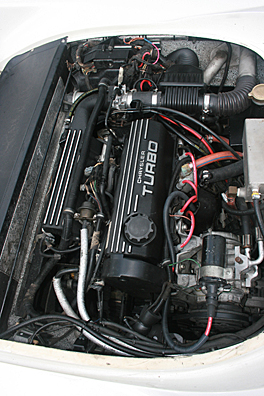 |
New plugs, wires, coil, filter, oil. And some cleaning. |
 |
At the alignment shop!
I asked for 1/2 degree negative camber per side
and 1/16" total toe in on the front.
They got pretty close.
Installed all 4 new headlights. Tape being on them for 18 years would not come off.
|
 |
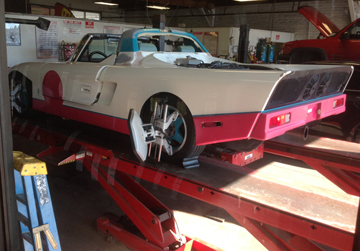
Its all together and drivable now.
September 2013 |
 |
Installed the mirrors. Installed the turn signals and side markers. |
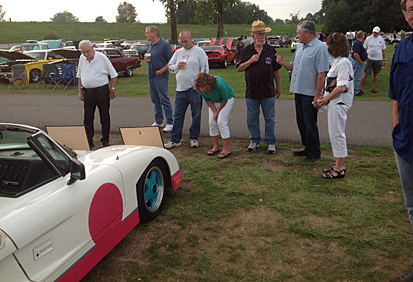 |
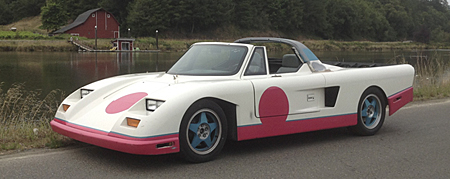
Took it to a couple car shows where it seemed
to get a lot of attention.
This one is at the "Beaches" car show at PIR
in Portland Oregon. |
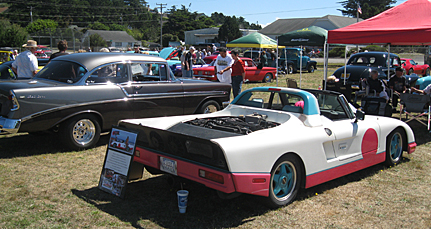 |
We drove it to and through the Redwoods
in northern California and on the way back stopped in the small town of Port Orford
for their festival and car show. |
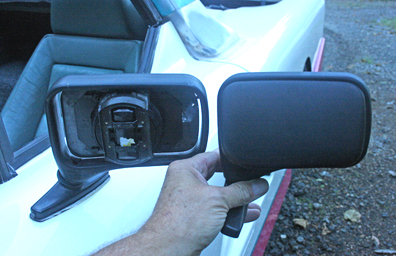 |
The electric rear view mirrors on each side of the car are missing the front pieces and could not find replacment ones.
I did find non-electric mirrors that look just about like the factory ones, just a little smaller. |
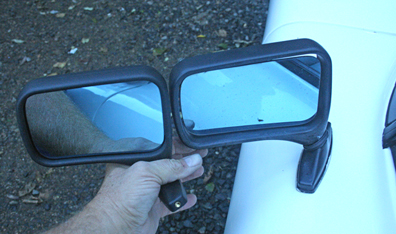 |
You can see here they are just a little smaller.
Plan to install them in the morning.
(done) |
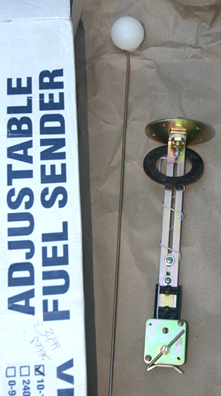 |
The gas gauge always shows half full/empty.
Found a new sender on ebay for $35. This should get the thing working. |
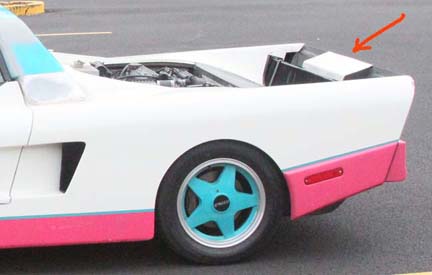 |
Had to make an aluminum piece for the rear.
The space across the back should have a wing
but it is missing. So made a piece for the center
so that the fans can suck air through the center
section of the radiator. This will work until
the correct wing is made. |
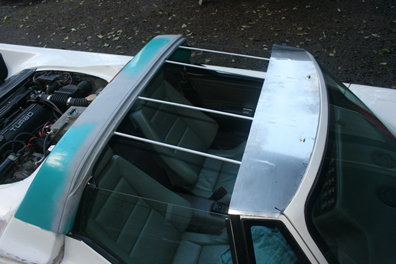 |
Building a targa convertible top for it. Not a pro job for sure, but will work til I can afford to get one done right. I have never done this before so am just winging it. My first aluminum welding
also. |
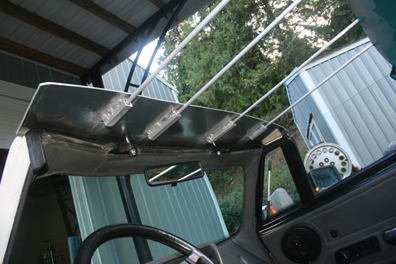 |
Shaped an aluminum "header" piece that bolts with 2 bolts to the windshield area. I welded 4 square tubes to it which hold 4 aluminum rods that go back to the targa bar. These go into holes that were already there. |
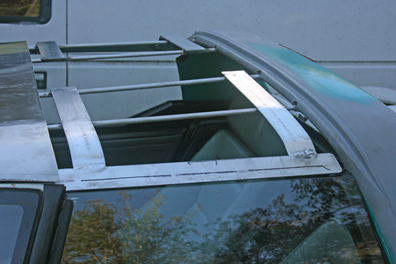 |
Then I shaped and welded some flat bar to the rods. Next will cut and attach the canvas. |
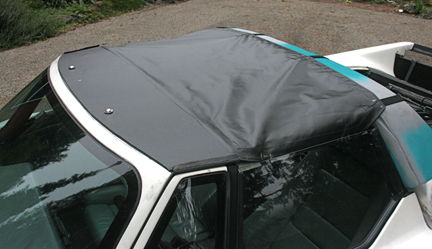 |
Cut and fitted the canvas. Had a shop sew it for me after I glued the main part. Then had velcro straps sewed on to hold it in place.
Not perfect but it does keep the heat in and the rain out. |
 |
Took off the old exhaust system. Installed a
3" swing-valve on the turbo so I could run
a true 3 inch exhaust system.
The old system using a "supertrap" style
muffler was very restrictive. |
 |
This shows the old and new and how much
larger the new system is. |
 |
All installed using V-band clamps. Used a 3"
Inlet and outlet Cat. Also a dual 3" Monza tip. |
Passenger side window went down last weekend but would not go back up. Got the "HELP!" auto parts section part number 74410.
It is only three plastic roller bushings. Said for Ford on the package, but they worked perfect as a replacement for the GTP.
My gear was still good. So just cleaned out the old plastic roller bushings
which were ground to tiny pieces.
Re-lubed and now all back together and works perfect. |
|
 |
Rear suspension resto is next. The rear shocks were sent to Bilstein for a re-build as they were
pretty well shot. The ball joints also need replaced. The rubber control arm bushings were
changed out for polyurethane bushings. |
 |
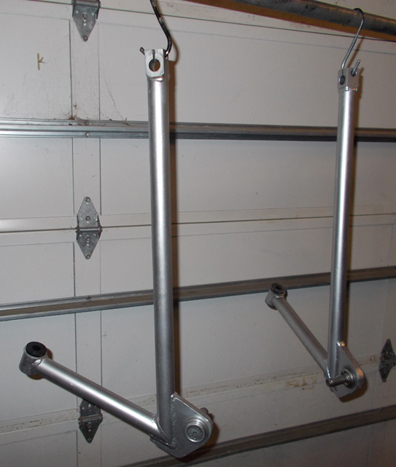
A shot of the rear suspension. The control arm
pivots on a ball joint (top of photo) and normal
bushings at the other pivot point. |
 |
Got the a-arms cleaned up and painted. Ball joints and bushings in. Ready to install.
By the way, these a-arms weigh 5-1/2 lbs each (without bushings and balljoints) |
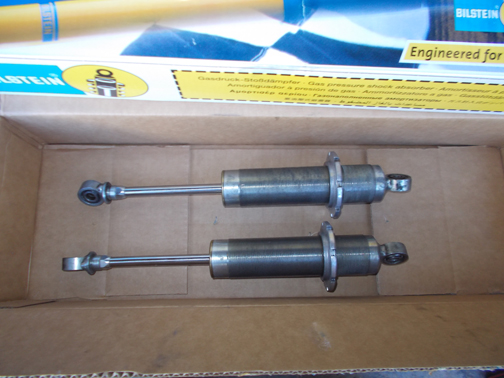 |
UPS truck showed up today with my Bilstein
shocks that they rebuilt for me. (3-11-14) |
 |
They are the coilover design. Ready to install! |
 |
A-arms are installed with all new bushings and balljoints. I know, needs a lot of cleaning. |
 |
Looking up (this is the rear of the car). |
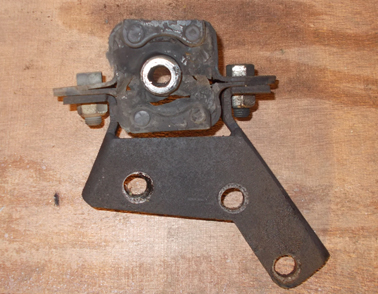 |
Also removed the worn out drivers side engine mount (transaxle mount really) and installed a polyurethane one. |
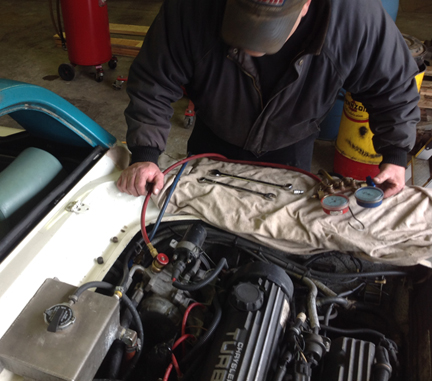 |
Not a hot day out, but had an appointment to
get the AC fixed this morning. The test showed
no leaks. Converted it to 134 instead of feon.
Now the next trip in the hot summer will be
more comfortable. |
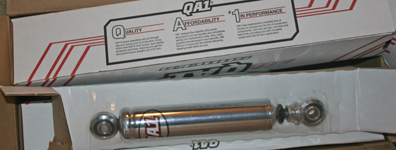 |
The new front shocks showed up today.
Click here for install page. |
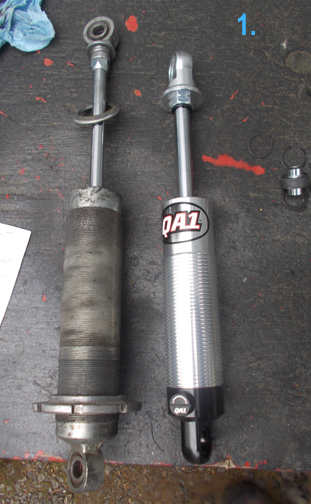 |
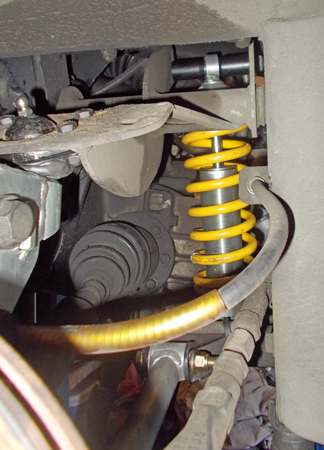
The rear shocks were replaced with QA1 coil-over shocks. I made a mistake of not checking free length and they bottmed out. This car was lower than the other Consulier GTP's, leaving only 1-1/2 inches before they hit.
Bought shorter, adjustable shocks that should work better with the lowered suspension.
I could have had the Bilstein shocks fixed and changed mounting points but I wanted to try the QA1's.
These were purchased from Summit,
part number HAL-DS401.
|
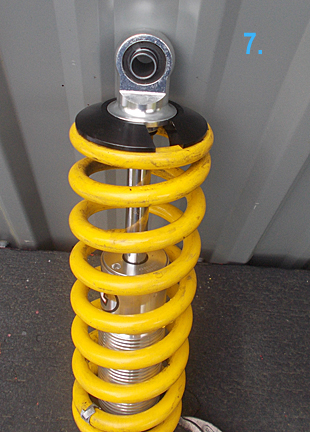 |
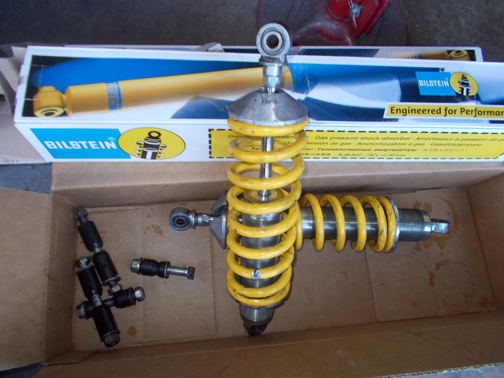
Stock springs on the shocks. Now installed. |
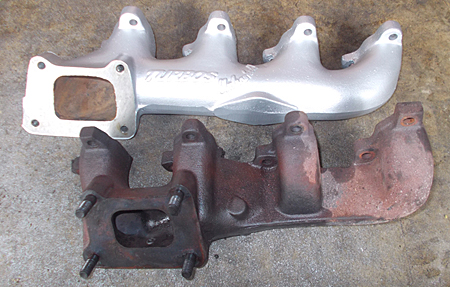 |
The factory exhaust manifold and the new ceramic coated, free flowing manifold
side-by-side.
Sourced from TurbosUnleashed.com |
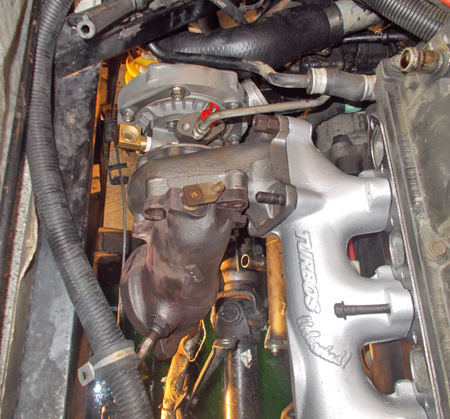 |
The new manifold moves the turbo in a position that's about 3 inches to the left of stock. This test fit shows it fits and does not hit the frame at all.
New turbo is a Garret Super 70, with a 3 inch swing valve. (the turbo's exit)
Next step is to install/test fit the new oil and water lines that feed the turbo. |
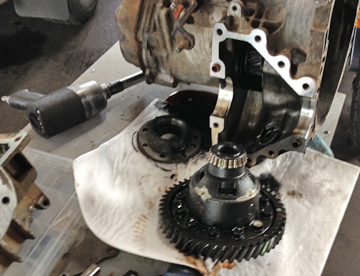 |
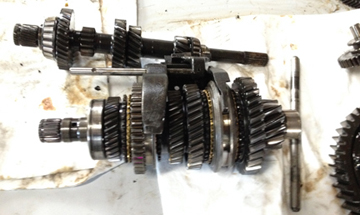
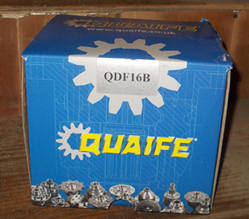
Took a 555 transaxle I had to a friend for inspection
and freshening up (bearings, syncro's, etc).
Also going to add:
Case drain plug
eavy duty chrome-moly bearing support plate
Quaife limited slip
NOT going to install it right now, just want it ready "in case".
I know that won't happen but this is my insurance. Otherwise it will be installed next winter. |
 |
 |
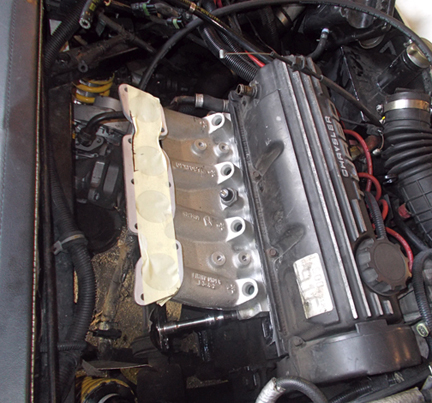 |
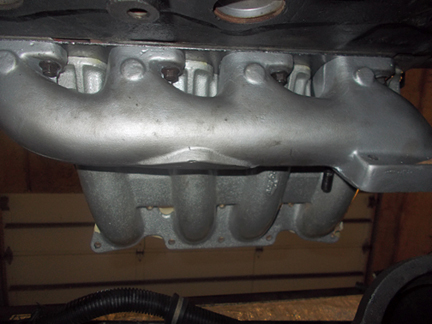
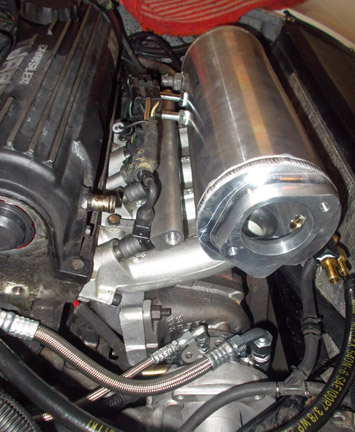
Worked and worked on the install of the exhaust header and new intake today. Would have been easier to take the head off and install them and put the head back on. But I didn't do it that way.
The lower part of the intake is on and the TU header is bolted up. Nuts are not quite tight enough yet.
This is a shot during intake testing. |
 |
To get the nuts tight, I need a different 10mm wrench, something with more angle on the head. Not sure if something like that is made. If not I will be cutting and welding to make one.
Shot from below with both intake
and header
installed. |
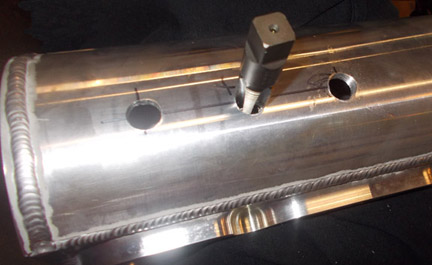 |
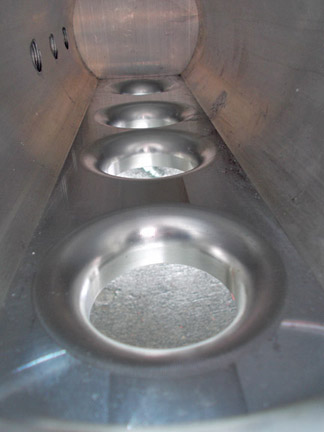
Taping vacuum port fitting holes in the top part of the intake.
Next shot below-left is the inside of the intake.
Lower-right photo: Intake is together. Fuel rail and njectors in.
Next step is attaching vacuum hoses and fuel lines.
|
 |
 |
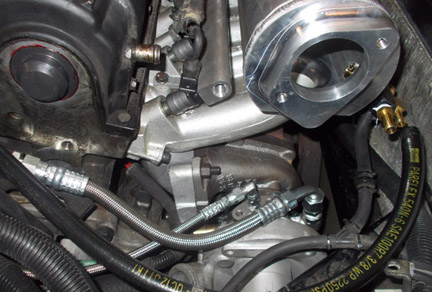 |
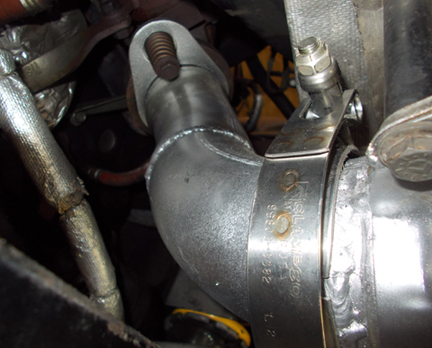
Braided steel fuel and water lines to the turbo. |
| |
|
| |
|
| |
|
| |
|
| |
|
| |
|
| |
|
| |
|